This article is a “follow-along” tutorial covering how I paint and texture asphalt driveways, concrete sidewalks and gravel rooftops on my model buildings. It is based on a technique I learned when developing a method of applying a slight texture to the roadways on my layout. I typically work in N scale, but this technique can be applied to any scale simply by changing the distance between the spray can and the surface of what you’re painting.
No matter if I’m painting a driveway, a sidewalk or a rooftop, I typically use three to five different colors of paint to achieve the realistic look I’m going for – the last color often being a very light misting of the first color. Combining multiple colors with the misting method really helps achieve a more realistic appearance.
Step 1 - The Paint:
To keep the cost down, I use inexpensive aerosol spray paint from my local hardware store. No sense buying the more expensive hobby spray paints for something you’re just going to cover with weathering powders and washes. I typically use either KRYLON or Rust-Oleum brands for this kind of work. See PHOTO-1 for the colors I used for this tutorial. I use flat or satin finishes when I can, but depending on the color I’m looking for, I’ll also use gloss finishes if that’s the only way the color I want is available.
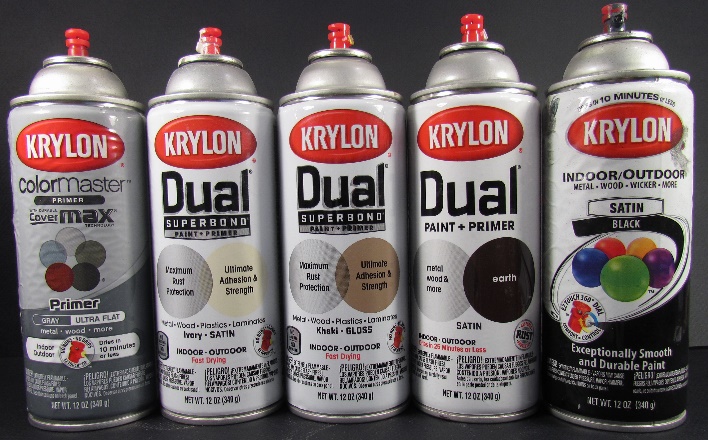
Photo 1
Step 2 - Preparing the Surface:
After lightly sanding the surface of the driveway and sidewalk with either a 220 grit sand paper or a scuff pad, I apply a liberal coat of dark gray primer as seen in PHOTO-2.
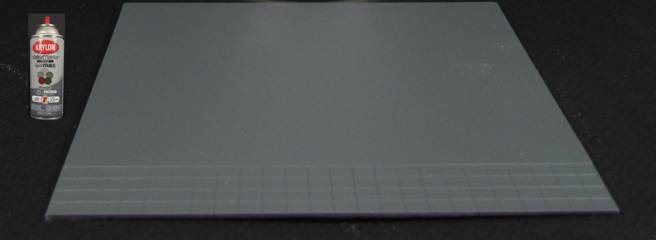 Photo 2
Once the
primer has dried, I mask off the sidewalk.
While I want a little texture on the sidewalk, (which helps with
weathering), I don’t want it to be as textured as the asphalt driveway will be.
See PHOTO-3.
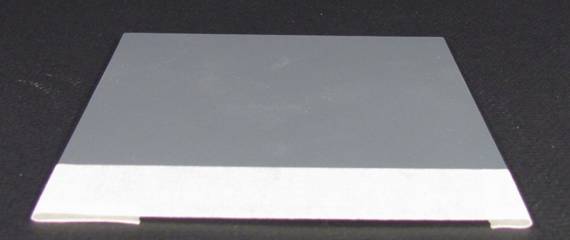 Photo 3
Step 3 – Adding the Primary Asphalt Color:
Now it’s time to start texturing the surface and adding the layers of color that will make it look like real asphalt. For this tutorial I want a fairly worn looking finish, which is typically a lighter shade of gray when done. While I have used Testors Fabric Tan, Black and Gray paints to get a lightly textured surface, I found that quickly misting several light coats of paint from 12 to 18 inches away achieves the same textured result with a lot less expense. For the asphalt driveway areas, I start with the darker colors first by misting on a light layer of black. See PHOTO-4.
To avoid the drips or large spatter that you sometimes get with this type of aerosol can, I often hold the piece upside-down, spraying upwards towards it from below.
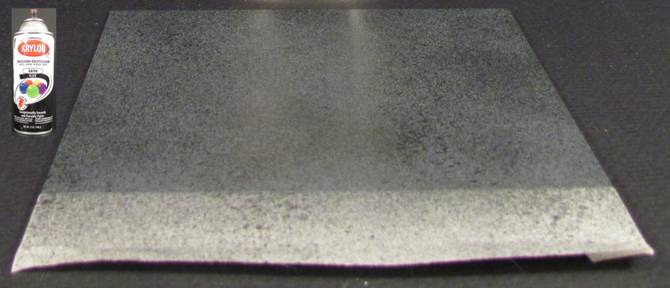 Photo 4
Step 4 – Adding a Dark Earth Tone:
As mentioned earlier, I want a fairly worn appearance, so I’ll add a couple of earth-tone colors at this stage. I start with a light misting of a dark brown color. Don’t apply so much that you completely cover the black color from the prior step. See PHOTO-5.
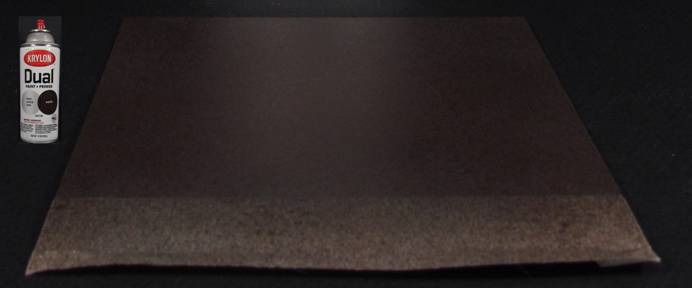 Photo-5
Step 5 – Adding a Light Earth Tone:
Follow that with a light misting of a lighter brown earth-tone, again not completely covering the colors applied in the prior steps. See PHOTO-6.
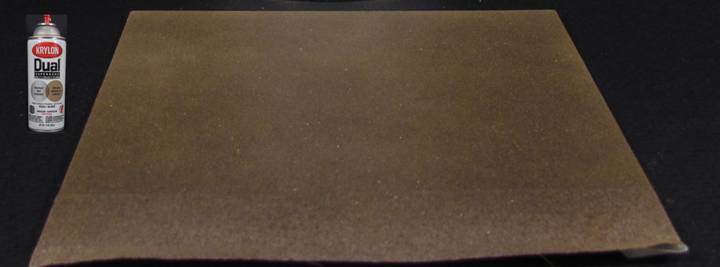 Photo 6
Step 6 – Adding Age by Lightening the Overall Color:
With the earth-tones applied, I will mist on an ivory or sometimes a light gray color to give the surface a more aged appearance. See PHOTO-7. Using color references from the period and region your modeling really helps determine which colors and shades will work best for you.
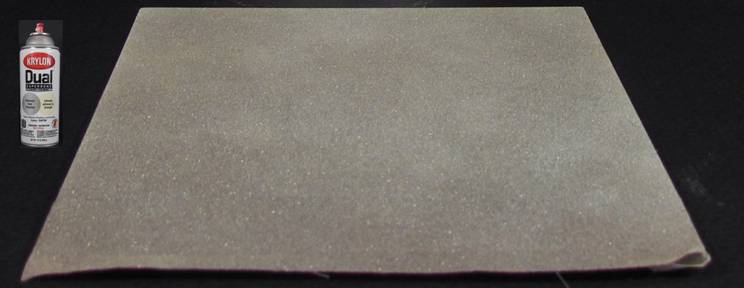 Photo 7
Step 7 – Applying the Final Shade:
Depending on how old I want the asphalt to look, I’ll often apply a very light misting of dark gray or black to finish off the affect. See PHOTO-8 where I applied a light mist of the dark gray primer for the final color.
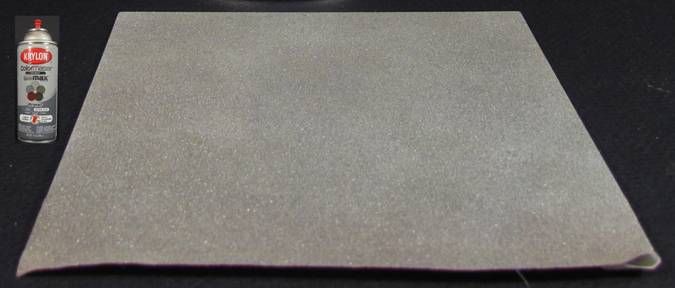 Photo 8
Step 8 – Examining Your Work:
Remove the masking tape from the sidewalk area to see the dark gray primer color we started with compared to the asphalt finish we’ve just applied to the driveway. See PHOTO-9.
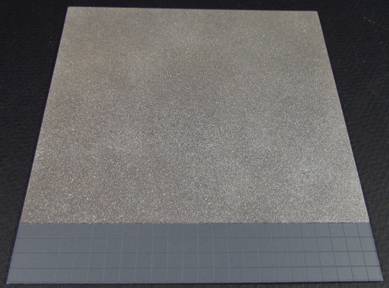 Photo 9
PHOTO-10 illustrates the progression of colors used to paint the driveway. At this point I’ll look at the overall result and reapply any colors as necessary to achieve the “look” I’m going for on a particular model. This will sometimes include reapplying one or more of the colors to get the overall shade that I’m trying to achieve.
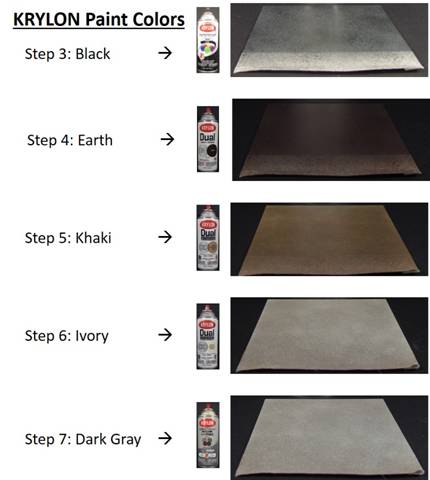 Photo 10
Step 9 – Painting the Sidewalk: The sidewalk is painted using the same technique and colors as the driveway, but this time we’ll go from light to dark when applying the various layers of paint. Start by masking the driveway as seen in PHOTO-11
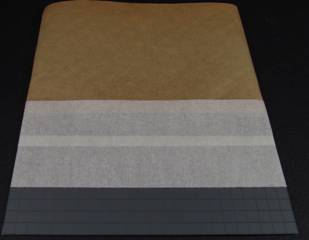 Photo 11
Step 10 – Applying the Cement Foundation Color:
Depending on the region and age of the concrete I’m trying to achieve, I’ll often start with a light gray color for newer concrete or an ivory color for older concrete. I typically mist on a heavier coat of color, but not so much that I completely cover the dark gray primer basecoat. See PHOTO-12.
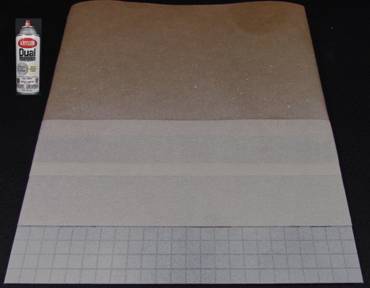 Photo 12
Step 11 – Adding a Light Earth Tone:
With the cement foundation color applied, I’ll typically mist on a couple of earth tones, again using the same colors I used for the driveway. See PHOTO-13.
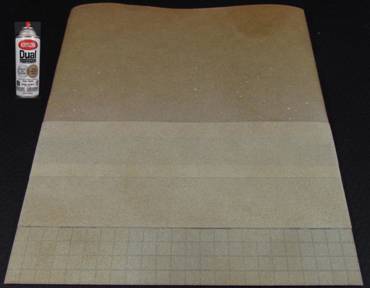 Photo 13
Step 12 – Adding a Dark Earth Tone:
To keep the sidewalk from looking too monotone, I’ll also mist on a very light coat of a darker earth color. It doesn’t take much of the darker colors to really show up against the lighter foundation color. See PHOTO-14.
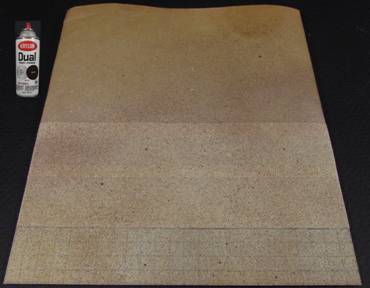 Photo 14
Step 13 – Shading with Gray:
This is where color references from the period and region you’re modeling really help. While new cement typically starts out as a medium gray color, lightening as it cures, I’ve seen aged cement ranging from a very light yellowish-green hue to a very dirty brown. For this tutorial, I used the dark gray primer to shade the cement, pushing the earth-tones a little deeper into the finish, as dirt and silt would naturally be with age. See PHOTO-15.
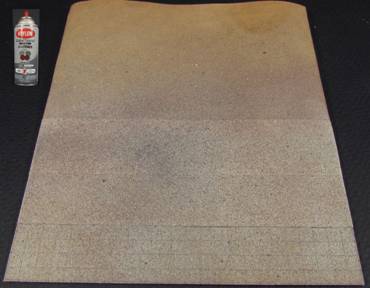 Photo 15
Step 14 – Applying the Final Shade:
The last step is to very light mist on a coat of the foundation color. See PHOTO-16 where you will still see the various gray and earth tones under the top ivory color.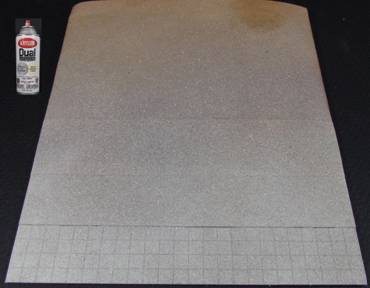
Photo 16
Step 15 – Examining Your Work:
Remove the masking tape and paper from the driveway area to see the contrast between the asphalt driveway and the cement sidewalk to this point. See PHOTO-17.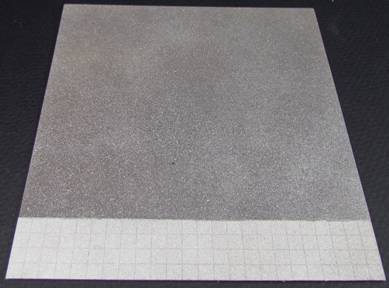
Photo 17
PHOTO-18 illustrates the progression of colors used to paint the sidewalk. At this point I’ll look at the overall result of the sidewalk and driveway, then reapply any colors as necessary to achieve the “look” I’m going for on a particular model. This will sometimes include reapplying one or more of the colors to get the overall shade that I’m looking for.
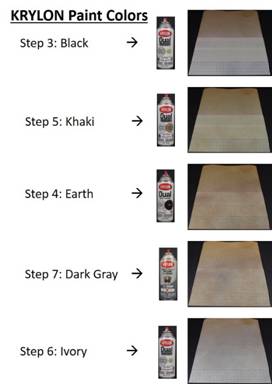
Photo 18
Step 16 – Sealing Your Work:
Once I’m satisfied with the overall look of the driveway and sidewalk, I’ll seal everything with a healthy application of Matte finish. Since I typically do not use my airbrush, I like using KRYLON Matte Finish #1331 in an aerosol spray can for this step. This seal coat makes it easier to apply the water-based washes I’ll use to tie the weathering of the sidewalk and driveway areas of the model.
Other Applications of the Misting Method:
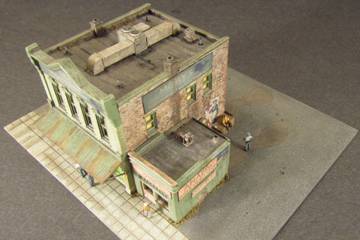
This method of misting several colors of paint can also be applied to rooftops that are intended to look like they’ve been covered with tar and gravel. See PHOTO-19 where an unfinished building was placed on the driveway and sidewalk that was painted for this tutorial.
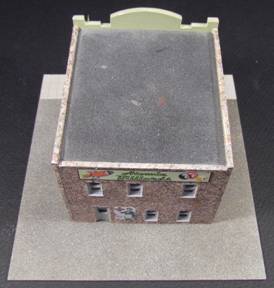 Photo 19
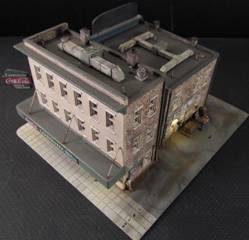
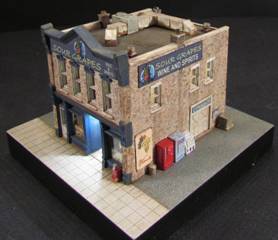
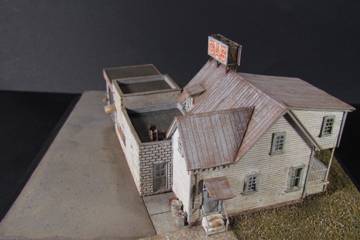
Other Examples:
Shown below are a few examples that can be achieved by combining this method of painting of driveways, sidewalks and rooftops with various weathering powders and washes. You can find additional examples of buildings I’ve painted and weathered on my FOTKI site: http://public.fotki.com/Raul56Perez/n-scale-buildings-1/
Please feel
free to contact me at raulperez10@comcast.net
if you have questions about this or other model building techniques.
